GENERAL EXHAUST FITTING GUIDE TIPS
BEFORE YOU START
1. Once you have received your performance exhaust system, check all the components against the corresponding packing list.
2. For safety purposes and ease of installation, wherever possible we recommend that you take your vehicle to a qualified installer with a vehicle lift to install your exhaust system.
3. If you are carrying out a home install, then park your vehicle on a level surface and allow time for the vehicle and exhaust to cool down.
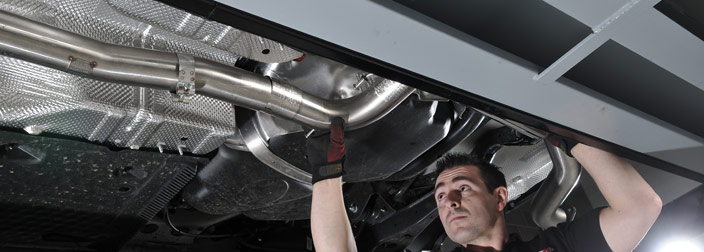
4. Remember to always use axle stands / jack stands to support the vehicle when working underneath.
5. Wear protective clothing, including eye shields.
6. Disconnect the battery if working near electrical connections.
REMOVING THE STOCK SYSTEM
7. Spray all bolts, joints and mounts with releasing fluid, allow to penetrate for about an hour.
8. Release all connectors or clamps on the system and then start to dismantle the system from the rear forwards. Some stock systems are installed in one piece by the vehicle manufacturer before the suspension or rear axle are installed, these systems will need to be cut to be removed.
9. Stock systems are heavy, so make sure that you have help or can adequately support the system when it is released.
10. Sometimes removing the rubber hangers can be difficult, removing the bracket from the body may be a better solution.
INSTALLING THE MILLTEK SYSTEM
11. Remove all protective packaging for your new performance exhaust system and assemble the unit on the ground, make sure that each joint has a clamp and that the rubber hangers are transferred from the stock system. Replace any worn or damaged mounts.
12. Smear a small amount of exhaust assembly paste inside each slotted joint, this will help prevent leaks on start-up and the pipes from seizing together.
13. Install the system, front to back without tightening any of the clamps on any of the joints.
14. Position the system so that the hangers are ideally inclined to the front of the car by 10-15mm, these hangers will then move into their correct position when the performance exhaust system is hot and expands.
15. Make sure that there is adequate clearance around the system, remembering that this exhaust system will expand by around 25mm when hot.
16. When the Milltek Sport exhaust system is in the optimum position, tighten up the clamps from the front to the back, adjusting the system as necessary. Do not over-tighten the clamps.
RUNNING THE MILLTEK SPORT EXHAUST SYSTEM FOR THE FIRST TIME
17. Wipe off all oil, grease and fingerprints from your Milltek Sport exhaust system.
18. Make sure that all covers, heatshields and brackets have been replaced.
19. Reconnect the battery if necessary.
20. Do not start the engine in an enclosed space, adequate ventilation is always required.
21. Start the vehicle and allow to run at tick over until the exhaust system is warmed up.
22. Check the system for leaks, it’s not unusual for condensation to find its way out of the joints in the warm-up phase.
23. Take your vehicle for a test drive and allow the vehicle to reach optimum running temperatures. After test drive, re-check all the joints and clearances whilst the exhaust system is still hot and re-adjust if necessary.